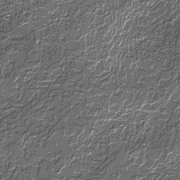
 Back to the layers pallette, and let's choose the top layer, #4. With nothing selected, go to the filters menu and select "lighting effects". When that fires up, (could take a few seconds), we're ready to go. I used 2 spotlights for this image. In the "styles" menu, choose "crossing". Click on the small white circle at the center of that ellipse, and move it to the side. This is one spotlight. The straight line is pointing towards the source of the light. Click on one of the outside dots, and turn the light so it's coming from your top left. Click on the other white dot, and now that spotlight is activated. We want to point this one from the bottom right, but we don't want it to shine white light. Unlike the real world, we can also shine darkness out of these spotlights. Cool, huh? Click on the white square in the "light type" window, and a color pallette will pop up. Let's choose a very dark purple, almost black. Say OK, and now we'll see how it looks. OK, let's make this thing 3D now. Go to the bottom menu, "texture channel", and select your blurred channel, it should be "channel 5". Select the check box, "white is high", and choose a height of about 16. Don't go overboard, that thumbnail drawing of what's going to happen is not super-accurate. If you have the height *too* high, you'll get some bizzare effects at the edges. Play with the settings in the "Properties" menu, the bottom two will control your brightness, "exposure" by just making things lighter or darker, and "ambience" by shing an overall light of the color in the square over the entire image. The top two settings, "Gloss" and "Material", will affect the final result the most. You can choose "shiny" and "plastic" at 100%, and your image will throw off a bright reflection, just like hard plastic. Back to the layers pallette, and let's choose the top layer, #4. With nothing selected, go to the filters menu and select "lighting effects". When that fires up, (could take a few seconds), we're ready to go. I used 2 spotlights for this image. In the "styles" menu, choose "crossing". Click on the small white circle at the center of that ellipse, and move it to the side. This is one spotlight. The straight line is pointing towards the source of the light. Click on one of the outside dots, and turn the light so it's coming from your top left. Click on the other white dot, and now that spotlight is activated. We want to point this one from the bottom right, but we don't want it to shine white light. Unlike the real world, we can also shine darkness out of these spotlights. Cool, huh? Click on the white square in the "light type" window, and a color pallette will pop up. Let's choose a very dark purple, almost black. Say OK, and now we'll see how it looks. OK, let's make this thing 3D now. Go to the bottom menu, "texture channel", and select your blurred channel, it should be "channel 5". Select the check box, "white is high", and choose a height of about 16. Don't go overboard, that thumbnail drawing of what's going to happen is not super-accurate. If you have the height *too* high, you'll get some bizzare effects at the edges. Play with the settings in the "Properties" menu, the bottom two will control your brightness, "exposure" by just making things lighter or darker, and "ambience" by shing an overall light of the color in the square over the entire image. The top two settings, "Gloss" and "Material", will affect the final result the most. You can choose "shiny" and "plastic" at 100%, and your image will throw off a bright reflection, just like hard plastic.
 For this image, I selected "matte" and "metal" at 50% each, because I didn't want any highlights mucking up the transition between the image and the background. Here's the Lighting Effects window with the selections I used. Note the White spotlight is shining down from the left. The black spotlight is not selected, but it is shining *up* from the right. For this image, I selected "matte" and "metal" at 50% each, because I didn't want any highlights mucking up the transition between the image and the background. Here's the Lighting Effects window with the selections I used. Note the White spotlight is shining down from the left. The black spotlight is not selected, but it is shining *up* from the right. |


